Getting Started with Python
Let's learn how to download, install, and create your development environment to get started programming with python! Perhaps you've heard that coding is a superpower. Or you've read about this fancy machine learning stuff going around. Either way, you're probably asking yourself, "Where do I start?". Right here in this tutorial, with no previous programming knowledge required! Let's get started!
# Download and Install Python
There are two ways we're going to cover downloading Python. The first is to get it directly from python.org (opens new window). This is a more bare-bones setup if you want to start from a blank slate with the built-in libraries. The second option is downloading a python distribution from Anaconda (opens new window) and is the approach I recommend. This "batteries included" way of installing python gives you access to many tools that will make getting started easier. In particular, it includes great code editors such as jupyter notebooks and spyder.
# Installing from Python.org
Head over to python.org and click on the Downloads section.
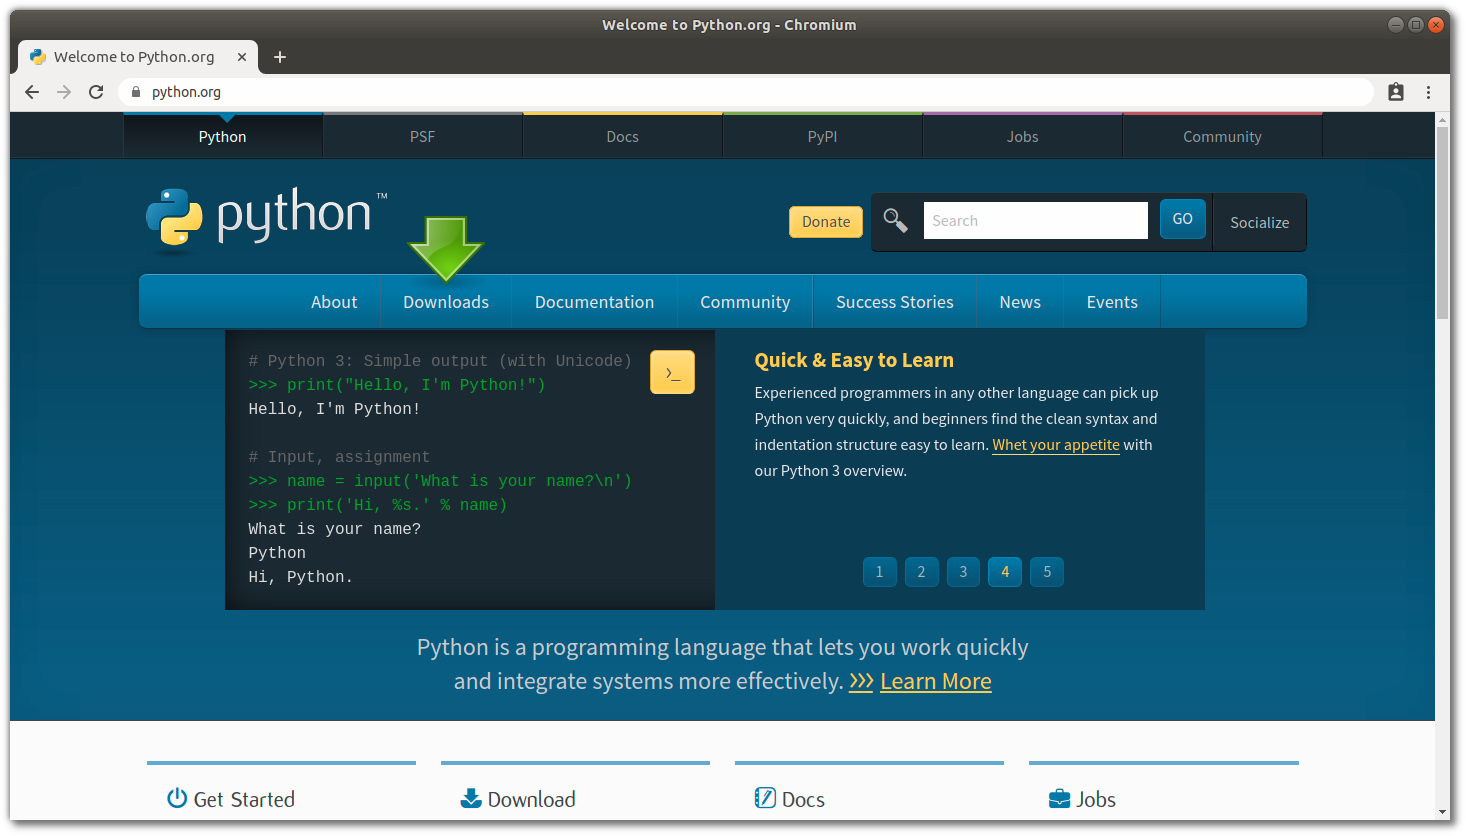
Here you'll be able to download the installer for your operating system. The latest version at the time of this writing is 3.8.
A Note on Python Versions
You're going to want the 3.X version of python. 2.X versions are not being supported any longer and you should avoid them unless you have a very specific reason.
Windows and Mac OS X have installers. Just download them and follow the prompts. If you're on Linux you'll have to build from source code. Or you can use the easier Anaconda distribution. See the section below.
During installation, you will want to check the box that adds python to your system path. This will allow us to run commands from the terminal or command prompt like so:
python --version
Output:
Python 3.8.1

# Installing from Anaconda
You can use this link (opens new window) to go directly to the download section for Anaconda.
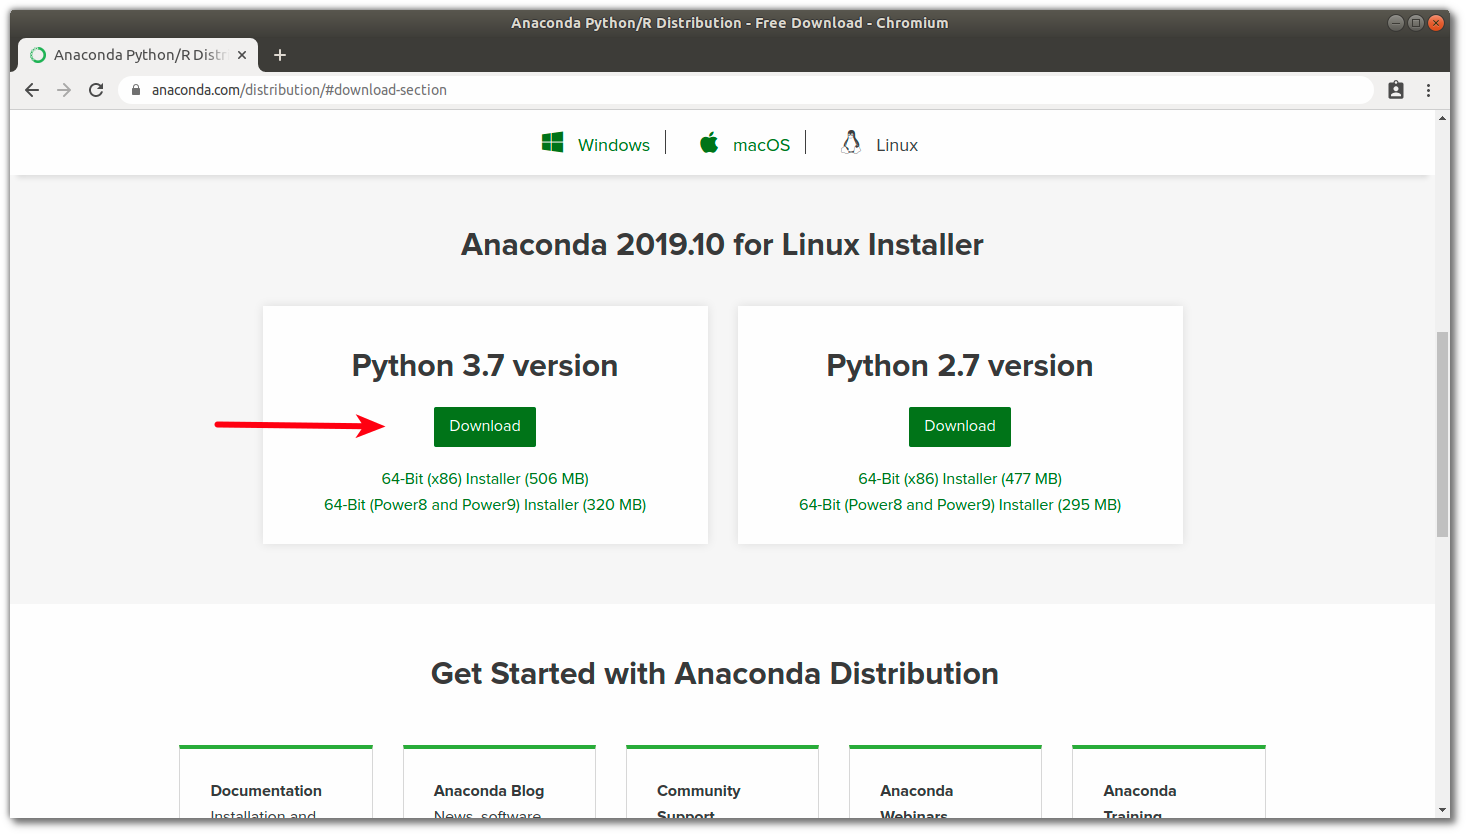
This time installers are provided for Windows, macOS, and Linux. Again, you'll want to get the 3.X version. You may notice the python version here doesn't match the latest version from python.org. That's okay! Anaconda is bundled to make sure all the dependencies work together well. You can still use the latest version python with Anaconda by creating a clean virtual environment, which we will discuss briefly later.
The downside is the installation file is large and make take a little longer to install.
The key packages and software this includes that make getting started easier are:
ipython- An improved python terminal.jupyter- A notebook-style way to write and save your code. Great for learning!spyder- A code editor / IDE that has a very useful variable explorer.numpy- A library for doing matrix math.pandas- A library for working with table data.matplotlib- A library for creating charts and graphs.
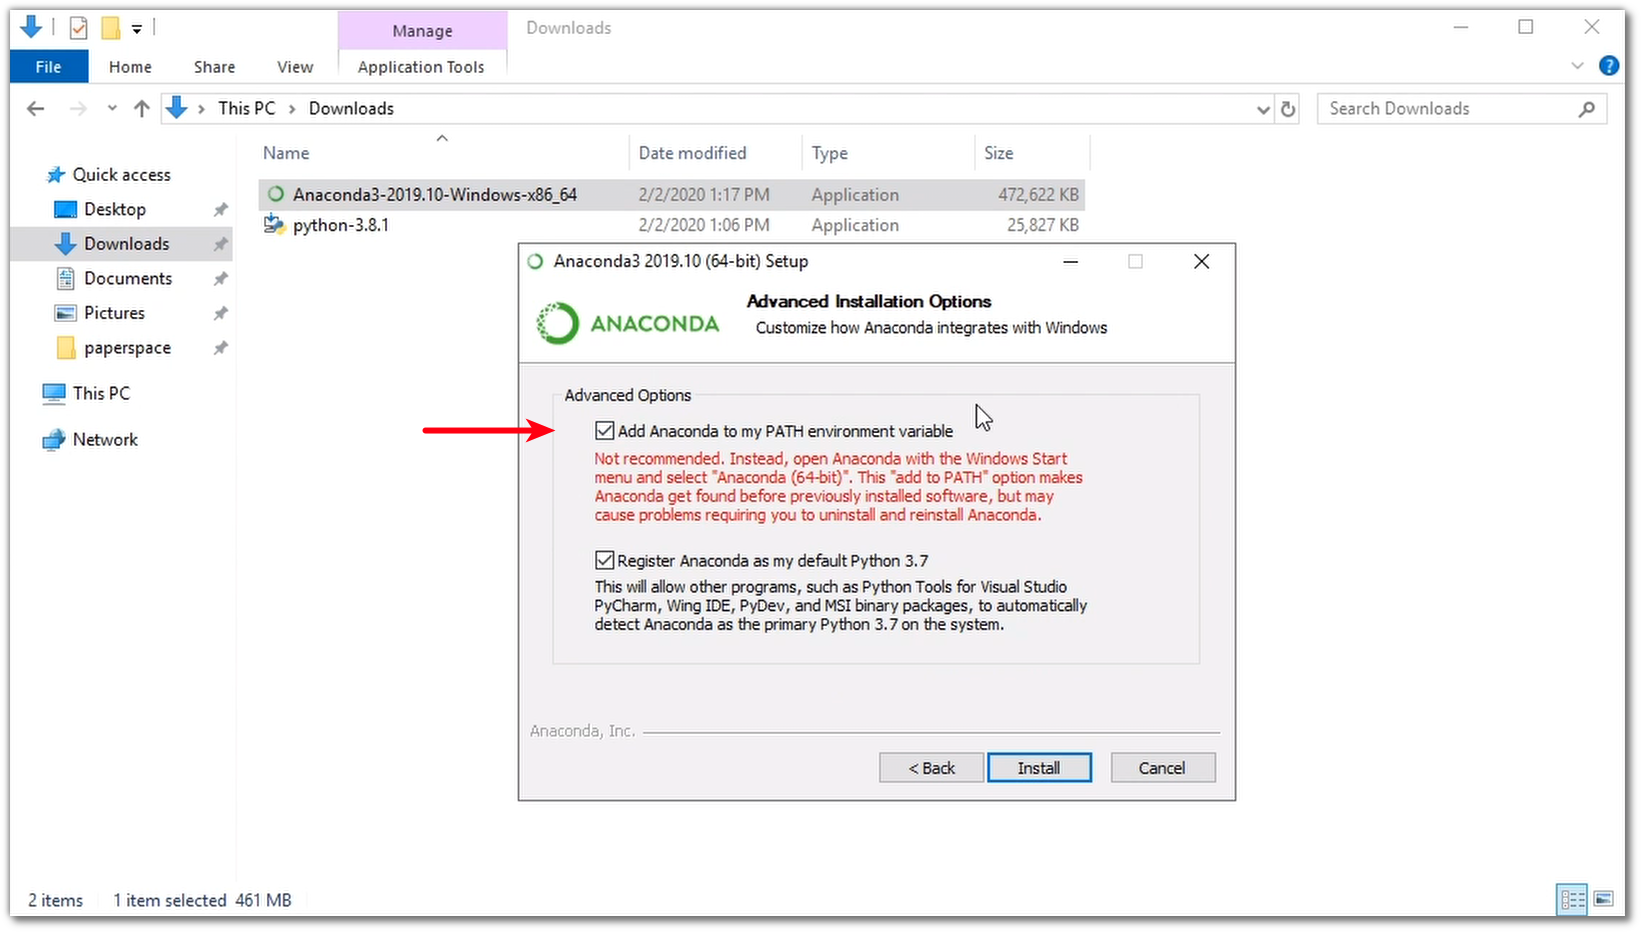
During the installation process, you will want to check the box that adds anaconda/python to your system path. Allowing us to use python commands in the terminal or command prompt.
python --version
Output:
Python 3.7.4
# Check Your Installation Works
Whether you chose to install from python.org or anaconda, you can see if
everything installed the way it should by running the command python --version
in your terminal.
Included with python is a package manager called pip. Let's also
check that it is included.
pip --version
Output:
pip 19.2.3 from C:\Users\paperspace\Anaconda3\lib\site-packages\pip (python 3.7)
If everything is working you can now use pip to install any library from the
python package index (opens new window)! A huge repository of software for
python. For example, if you installed from python.org and want to use jupyter
notebooks you can use this command:
pip install jupyter
# Pip vs Conda
pip comes with python. But if you installed with anaconda you will have another
package manager called conda. You can check if it's installed by using:
conda --version
You could use conda to install packages like jupyter:
conda install jupyter
Not all of the packages available on pypi.org are available with conda.
However, I find conda's search feature easier to use from the terminal. For now,
it won't matter whether you use conda or pip to install packages,
they will work together.
# Virtual Environments
Here is where conda becomes very useful. You can use it to create and manage
virtual environments. You can think of virtual environments as isolated areas
of code, or sandboxes, that keep packages you install in one from potentially
conflicting with another.
Here's a great example of a reason to use a virtual environment. If you
installed with anaconda, it came with a lot of packages already installed. You
can see this whole list by using the conda list command. It also may have come
with version 3.7 of python instead of the latest 3.8 version, at least at the
time of this writing. If you want to create a virtual environment to run try out
the latest version of python, no problem!
conda create --name myEnv python=3.8
This will download and install a whole new installation of python 3.8 into the
virtual environment which you named myEnv. And will only have a few basic
libraries. First, you'll need to activate this environment. Do that by
running:
conda activate myEnv
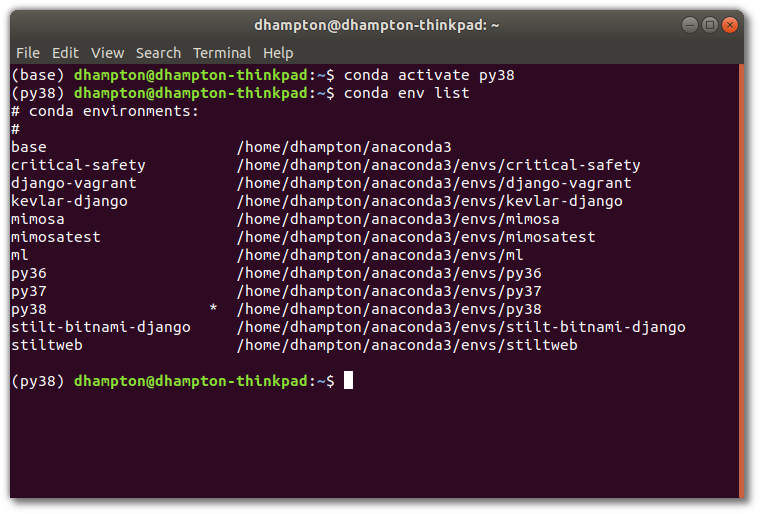
You've now gained access to the software in your virtual environment and, temporarily, lost access to the base environment. Try it out using these commands:
conda listpython --version
You should see a much shorter list of packages and a different python version number. Good job! You're becoming a pro at this command-line stuff!
conda deactivate returns you to your normal (base) environment. And
conda env list will show you a list of all environments on your system and
which is currently active. Super useful!
# Set Up Your Code Editor
The code editor is where you'll write the text files that make up your programs. You could write code in a plain text file without any fancy editors, but they include many useful features like code highlighting, hints, error messages, and quick access to documentation. Finding an editor you're happy with will save you a lot of time and can help you learn how to write better code.
You have the option of launching spyder, jupyter notebook, and vs code
from the Anaconda Navigator GUI as an alternative to the command line. Check
it out:

All of the editors listed here are available for free.
# Spyder (Recommended to Start)
Spyder is included in the Anaconda distribution and might be the easiest way to get started right immediately. If you've used MATLAB before the layout should be very familiar. The default layout includes a file editor, a python terminal, and a very handy variable explorer. Perfect for learning! This is my recommended choice for those beginners who just want to get started. VS Code is another great choice.
You can start Spyder from the command line:
spyder
Spyder's UI has 3 areas. The editor on the left, where you write longer
scripts of code. The ipython console, in the bottom right, where you write
code interactively, step by step and see the output. And the help window where
you can see the documentation for python commands at a glance.
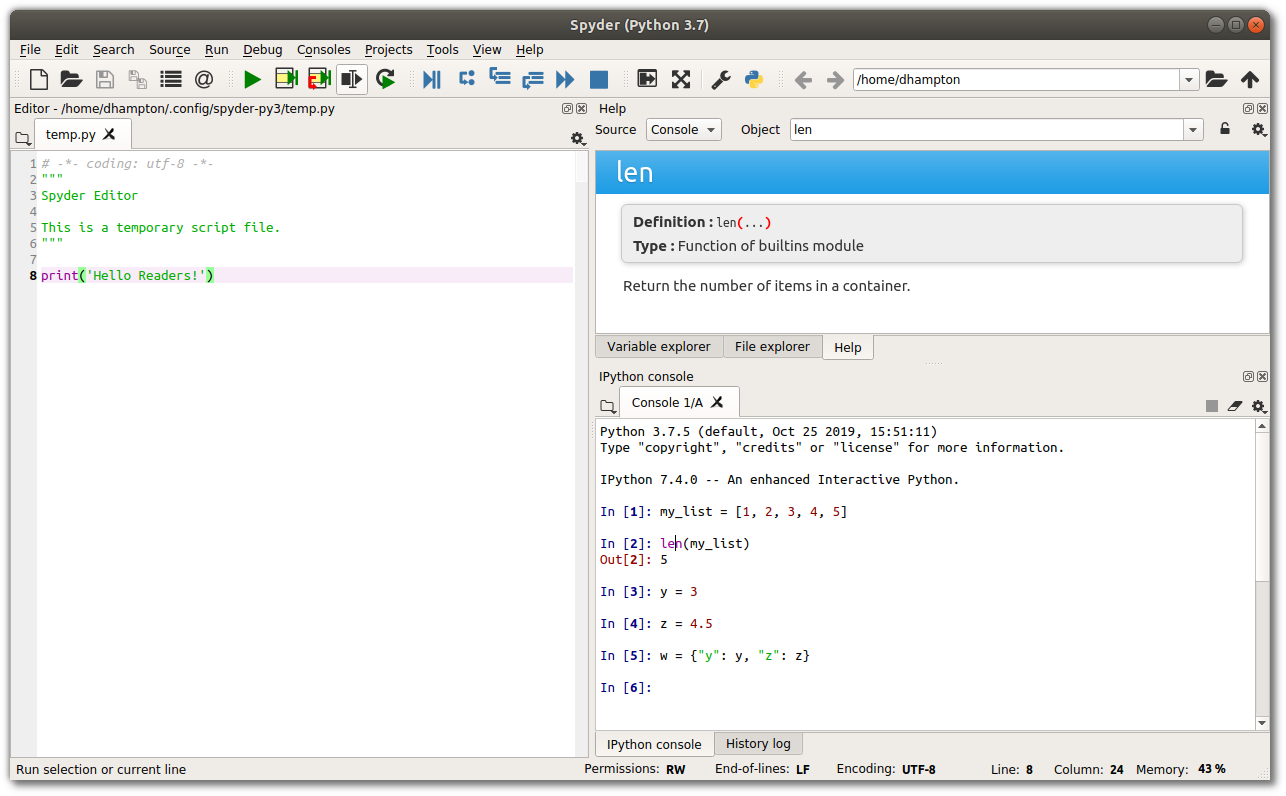
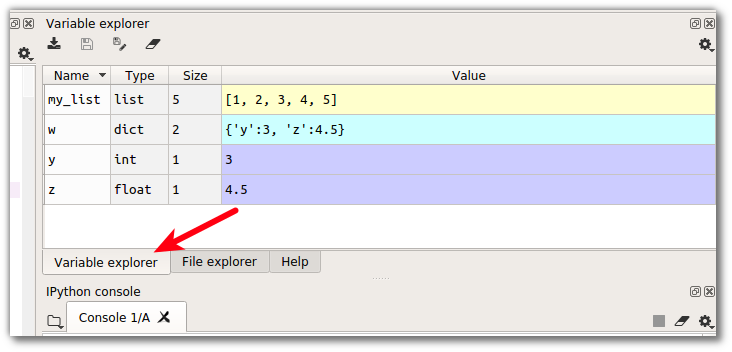
You can use the tabs below this help window to see the very useful Variable explorer. This lets you see what data and data types are stored as you enter variables into the console or run scripts. Fantastic for learning!
# Jupyter Notebooks
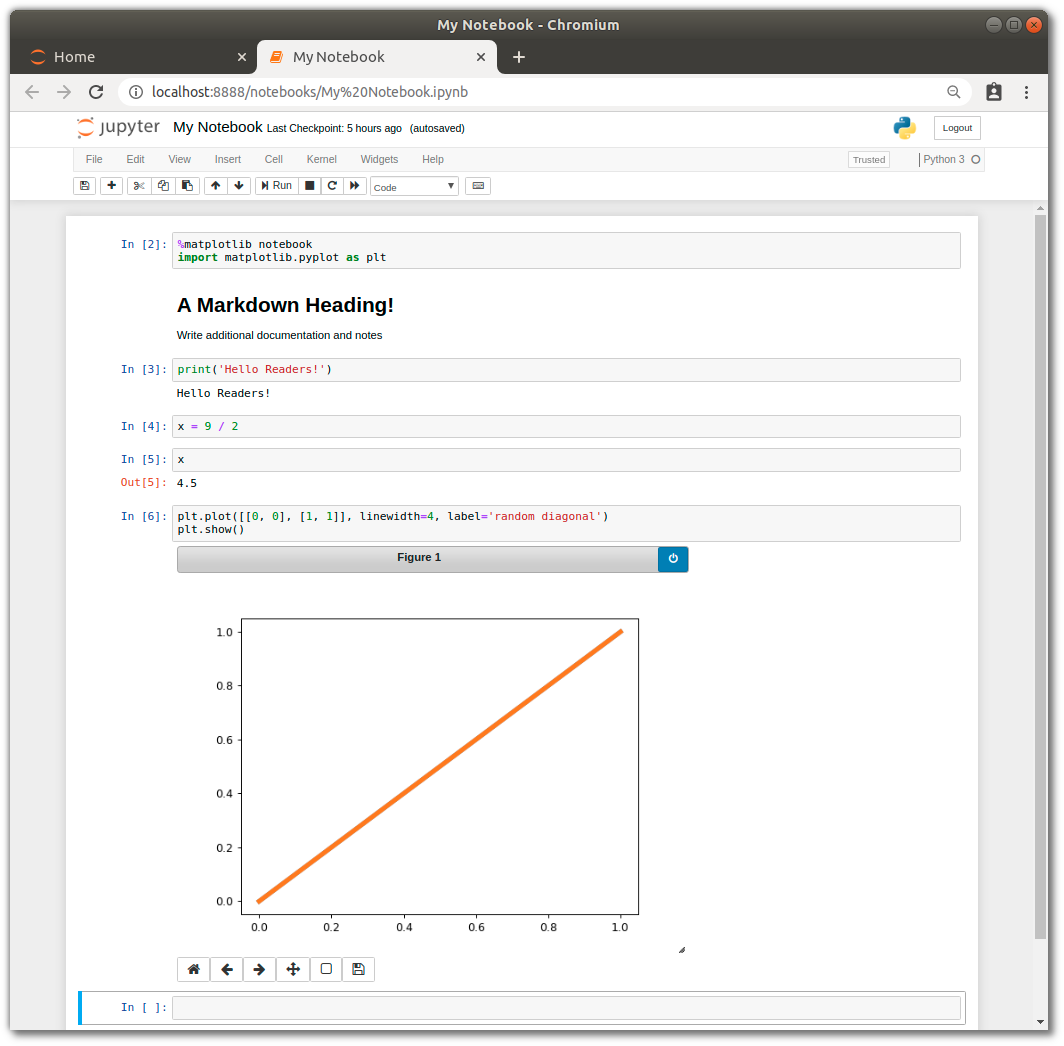
Jupyter notebooks are a great way to learn python interactively. Being able to enter code and immediately see and visualize the output helps develop understanding. You can save your work and document your code so you can always come back to it later for a refresher. Great for making plots and visualizing data.
Jupyter is included with Anaconda, but you can easily install it with
pip install jupyter. To start the notebook server run the following command
from where your files are located:
jupyter notebook
It should open up a browser window automatically. If not, check the terminal output for a link.
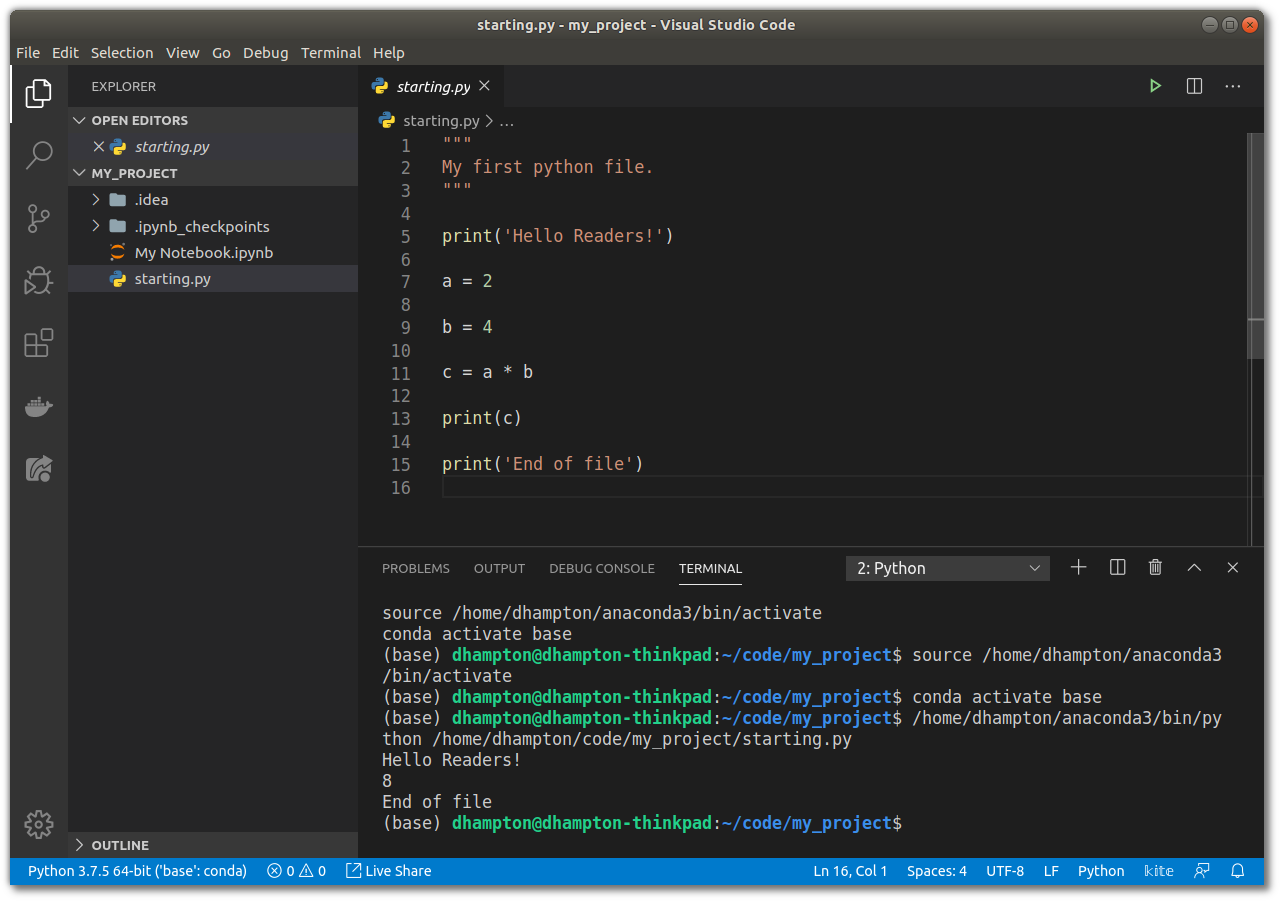
# VS Code
VS Code, or Visual Studio Code, is a very popular (and FREE!) code editor that
is extremely customizable through its huge extensions ecosystem. It doesn't have
all the bells and whistles out of the box, but when you're just starting that
can help you from becoming overwhelmed. Be sure to add the python extension
for syntax highlighting in your python files. You will likely get a prompt to
add it once you save your first .py file.
You can download VS Code here (opens new window).
You can access the terminal or command prompt from within VS Code. Type in
ipython and you've got a file editor and python terminal in one.
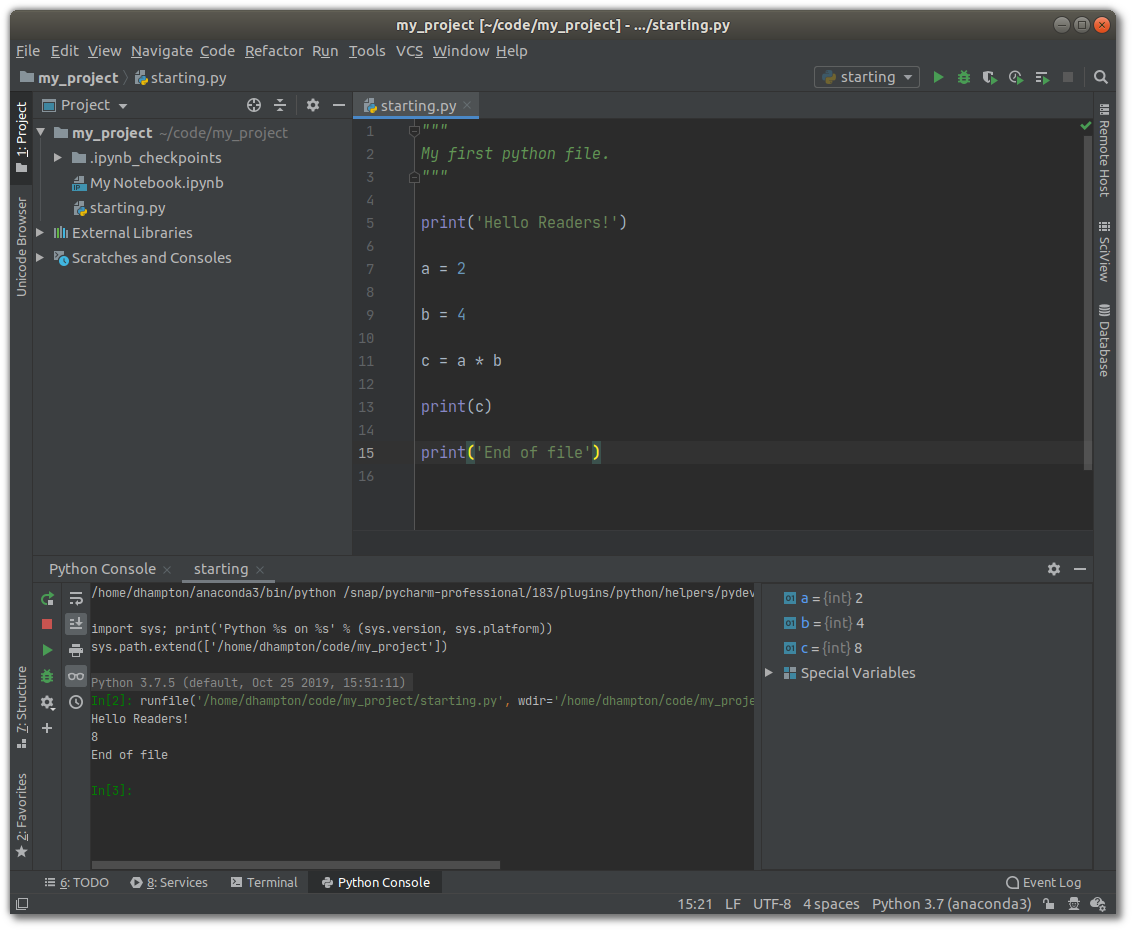
# PyCharm Community Edition
I'm a huge fan of the IDEs (Integrated Development Environment) from JetBrains. So much that I happily pay for PyCharm Professional to get some extra features. But they offer a free community edition that is fantastic. I find the settings and menus easier to navigate than in VS Code, and I prefer the shortcuts and keybindings in PyCharm, but that's an easy fix with extensions. Debugger, test runners, notebooks and more are easy to find and access if you want those features. PyCharm CE and Spyder are what I used when I first started learning to code.
You can download PyCharm here (opens new window).
# What's Next
You're off to an incredible start! Now that you've got everything set up, you're ready to start writing some code!
Let's review what we've learned:
How to:
- download and install python
- install a package with either
piporconda - create and use a virtual environment with
conda - download and start using several different code editors
In the next tutorial we are going to cover how to:
- use the
ipythoninterpreter to enter interactive commands - declare variables
- basic types
- basic operations
These are the essential python building blocks for writing code in python.
Here are some other great tutorial resources: